How to Replace Your Car’s License Plate Light (DIY Guide)
A working license plate light helps keep your vehicle street-legal and makes your plate readable at night. The good news: on most cars, replacing the license plate light bulb is a quick DIY job with basic tools.
This guide covers the safest step-by-step method, how to choose the right bulb, and what to do if the new light still doesn’t turn on.
Why the License Plate Light Matters
The license plate light (also called a tag light or number plate light) illuminates your rear plate in low-light conditions. When it fails, your plate can be hard to read at night, which may lead to unwanted attention from law enforcement and reduces visibility for other drivers.
Signs Your License Plate Light Needs Replacement
-
Dim or yellow light compared to the other side
-
Flickering when driving over bumps
-
Completely out (one side or both)
-
Moisture inside the lens or visible corrosion on the socket
Tools and Materials You’ll Need
Keep it simple. Most cars only require:
-
Small flathead or Phillips screwdriver (or Torx bit on some models)
-
Gloves (helps avoid oils on halogen bulbs and keeps hands clean)
-
Microfiber cloth (wipe lens and seals)
-
Replacement bulb or lamp assembly (depending on your car)
Choosing the Right Replacement Bulb
Use one of these reliable ways:
-
Owner’s manual (best)
-
Bulb chart at an auto parts store
-
Online fitment lookup by year/make/model/trim
Common bulb formats you may see: 194, 168, W5W, T10
Not universal, so verify before buying.
Safety Prep (Do This First)
-
Park on a flat surface and set the parking brake.
-
Turn the vehicle off and switch lights off.
-
If the lamp was recently on, let the area cool.
-
Work in good lighting so you don’t snap plastic clips.
Step-by-Step: Replace the License Plate Light Bulb
Tip: Some cars allow access from outside (lens pops out). Others require access from inside the trunk/hatch.
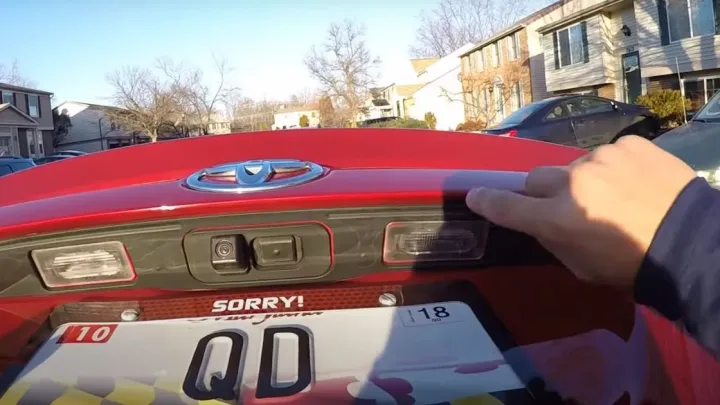
Step 1: Locate the License Plate Light
Look above the rear plate or on the trim near the plate. You’ll usually see a small clear lens or a compact lamp housing.
Step 2: Remove the Lens or Housing
-
If it’s held by screws, remove them carefully and keep them safe.
-
If it’s held by tabs/clips, gently pry at the notch using a flathead screwdriver or trim tool.
Don’t force it. Cold plastic breaks easily, especially in winter.
Step 3: Remove the Bulb Socket
Twist the socket counter-clockwise (usually a quarter turn) and pull it out.
Step 4: Remove the Old Bulb
Pull the bulb straight out. If it’s stuck:
-
Wiggle gently, don’t yank.
-
If corrosion is present, skip to the corrosion section below.
Step 5: Install the New Bulb
Insert the new bulb firmly.
-
If you’re installing LED, note that some LEDs are polarity-sensitive. If it doesn’t light, remove it, rotate 180°, and reinstall.
Step 6: Test Before Reassembling
Turn on parking lights/headlights and confirm the plate light works.
Step 7: Reassemble
-
Reinsert socket and twist clockwise to lock.
-
Reattach lens/housing.
-
Tighten screws snug, not overly tight (prevents cracking).
If the New License Plate Light Still Doesn’t Work
This is where most guides get too vague, so here’s a fast, real-world checklist.
1) Check the Fuse (Most Common)
If both plate lights are out, a fuse is a prime suspect.
-
Look up “license plate light” or “parking lights” in the fuse diagram (manual or fuse box cover label).
-
Replace with the same amperage rating.
2) LED Polarity (LED Bulbs Only)
If you installed LED and it doesn’t turn on:
-
Flip the bulb around and test again.
3) Corroded Socket or Contacts
Corrosion can prevent power flow.
-
Light corrosion: clean contacts carefully (contact cleaner helps).
-
Heavy corrosion: replace the socket or lamp assembly.
4) Loose Connection
Make sure the socket is fully seated and locked.
5) Broken Wiring Near the Trunk Hinge
Repeated opening/closing can fatigue wires.
-
Signs: intermittent flicker, light works when trunk is moved.
6) Water Intrusion
Moisture inside the lens suggests a bad seal or cracked housing.
-
Replace the gasket or housing to stop repeated failures.
LED vs Halogen: Which Should You Choose?
Halogen (standard)
-
Cheapest, simple, widely compatible
LED upgrades
-
Brighter, cooler color, longer life (often)
-
May cause flicker or bulb-out warnings on some cars
-
Can require a CANbus-compatible LED or resistor solution (vehicle-dependent)
If your car is picky about LEDs, using the correct halogen bulb is the safest “no-headache” fix.
Maintenance Tips (Make It Last Longer)
-
Clean the lens during car washes so light output stays strong.
-
Inspect for moisture after heavy rain or car washes.
-
If you see green/white crust on contacts, address it early before it becomes a wiring issue.
-
Replace bulbs in pairs if your car uses two plate lights and both are aging.
Frequently Asked Questions (FAQ)
Can I replace my license plate light myself?
Yes. Most vehicles allow a quick DIY replacement using a screwdriver and the correct bulb.
Do I need to remove the license plate to change the bulb?
Usually no. Many cars allow access from the lens or from inside the trunk/hatch, though some designs may require removing the plate bracket.
What bulb do I need for my license plate light?
It depends on the vehicle. Common types include 194, 168, W5W, and T10, but you should confirm using the owner’s manual or a fitment lookup.
Why won’t my new license plate light bulb work?
Common causes are a blown fuse, corrosion in the socket, a loose connection, broken wiring near the trunk hinge, or LED polarity installed backwards.
Is it illegal to drive with a broken license plate light?
In many states, yes. A non-working license plate light can lead to a traffic stop and possible penalties.
How long does it take to replace a license plate light?
Most replacements take 5–15 minutes.
Is LED better than halogen for license plate lights?
LED can be brighter and last longer, but some vehicles may flicker or show warnings unless you use compatible LEDs.
Disclosure
Some links may be affiliate links. That means we may earn a small commission at no extra cost to you.