A tail light “cover” is usually the lens: the red outer plastic that protects the bulb/LEDs and shapes the light output. The big question is whether you can replace only that lens, or if you must replace the entire tail light assembly.
Good news: many vehicles allow lens-only replacement, and it can be a fast, budget-friendly fix. But some designs are sealed, especially newer models with integrated LEDs, and those often require a full assembly swap.
Tail Light Lens vs Tail Light Assembly (Know What You Have)
Before you buy anything, identify which style your car uses:
1) Lens-only (serviceable lens)
You may be able to replace just the lens if:
-
The lens is sold separately for your make/model
-
The tail light housing is fine (no cracks, no broken mounts)
-
The lens is attached using screws, clips, or a replaceable seal
2) Sealed assembly (lens not separately replaceable)
You likely need the whole assembly if:
-
The lens is plastic-welded/glued from the factory
-
The unit has integrated LED boards (common on modern vehicles)
-
Mounting tabs are broken or the housing is warped
-
Water has entered and caused corrosion or cloudy residue inside
Rule of thumb: If the lens is not sold separately by the manufacturer and you don’t see clear service fasteners, it’s probably a sealed assembly.
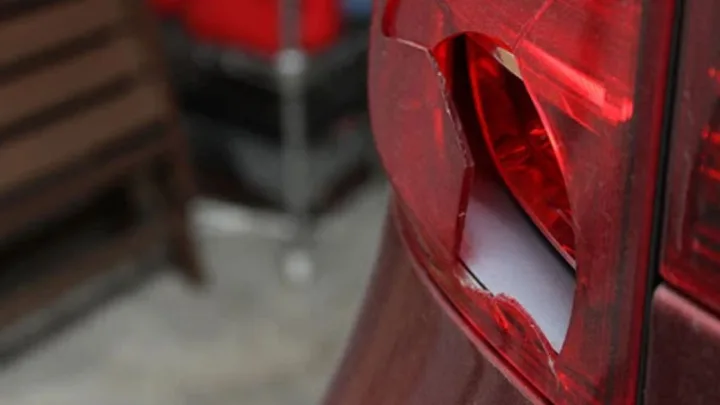
When to Replace the Lens (Cover)
Replace the lens if you notice:
-
Cracks or holes (water gets in, bulb life drops)
-
Deep scratches (light output becomes uneven or dim)
-
Faded/discolored red plastic (worse visibility and appearance)
-
Moisture inside after rain or a car wash (often from cracks or failed seals)
When You Should Replace the Whole Tail Light Assembly
Choose full replacement if any of these are true:
-
The lens is not separately available for your vehicle
-
The housing has broken mounting tabs
-
The light output is incorrect (white light showing through cracks)
-
There’s persistent moisture and visible corrosion or burning
-
You have advanced LED systems with safety features (brake/turn running light combos)
This isn’t about “overbuying,” it’s about not doing the job twice.
Cost, Time, and Difficulty (USA Expectations)
Typical cost ranges
-
Lens/cover only: ~$20–$120
-
Full assembly: ~$80–$400+
-
Shop labor (if needed): often ~$50–$150+ depending on access
Time + difficulty
-
Time: 20–60 minutes for most cars
-
Difficulty: Easy to moderate (harder if trunk trim removal is tricky)
Choosing the Right Tail Light Lens (Fitment Checklist)
Use this quick checklist so you don’t end up with “almost fits” frustration:
-
Match year/make/model + trim
-
Sedan vs hatchback can differ.
-
-
Confirm left or right side
-
Driver-side and passenger-side are not interchangeable.
-
-
Check part numbers
-
Use your owner’s manual, dealer parts diagram, or reputable parts listing.
-
-
Pick the right type
-
Red lens, clear sections, reflectors, bulb sockets (varies by model).
-
OEM vs Aftermarket (Which is smarter?)
-
OEM: Best fit and finish, often higher cost.
-
Aftermarket: Cheaper and widely available, quality varies.
If you care about “factory look” and perfect seals, OEM is safer. If budget matters, aftermarket can work well when reviews show good fitment and seal quality.
Tools and Materials You’ll Need
Basic tools
-
Phillips and flat-head screwdrivers
-
Socket set (common sizes: 8mm, 10mm)
-
Plastic trim pry tool (helps avoid scratches)
-
Microfiber cloth
Optional but helpful
-
Isopropyl alcohol (cleaning old residue)
-
Automotive-grade sealant (only if your design calls for it)
-
Nitrile gloves + safety glasses
Step-by-Step: Replace the Tail Light Cover (Lens)
These steps fit most vehicles, but trunk panels and fasteners vary.
Step 1: Access the tail light area
-
Open the trunk (or rear hatch).
-
Remove any trunk liner panels covering the tail light fasteners.
Step 2: Remove the tail light assembly (if needed)
Some cars require removing the entire assembly to change the lens.
-
Locate and remove nuts/bolts holding the tail light (often inside trunk).
-
Carefully pull the assembly straight back.
Step 3: Remove the damaged lens/cover
Depending on design:
-
Unscrew lens fasteners, or
-
Release clips gently with a plastic pry tool
Tip: If clips feel stuck, don’t brute-force. That’s how tabs snap.
Step 4: Clean the sealing surface
-
Remove dirt, dust, and old seal residue.
-
Wipe the edge with alcohol and let it dry fully.
Step 5: Install the new lens and align it perfectly
-
Fit the lens evenly.
-
Hand-tighten screws first, then snug them down.
Do not over-tighten. Over-tightening can crack the new lens or distort the seal.
Step 6: Reinstall the assembly and test
-
Reconnect wiring.
-
Reinstall trunk trim.
-
Test running lights, brake lights, and turn signals.
Waterproof Seal: How to Avoid Condensation and Water Leaks
Moisture inside tail lights is one of the most common “I replaced it and now it fogs” issues.
Prevent it with these checks
-
Confirm the gasket is present and seated correctly.
-
Ensure the lens edge sits flush with no gaps.
-
Replace damaged foam seals if they’re brittle or flattened.
If you see light fogging later
-
Light fogging right after a wash can be normal if ventilation exists.
-
Droplets/puddling inside is not normal and usually means a seal leak.
Common DIY Mistakes (Avoid These)
-
Buying the wrong side (left vs right)
-
Skipping fitment checks (trim/hatchback differences)
-
Over-tightening screws and cracking the lens
-
Reusing a damaged gasket/seal
-
Ignoring broken mounting tabs (causes vibration + leaks)
-
Not testing brake/turn signals before closing everything up
DIY vs Professional Help (When a pro is worth it)
DIY is great when:
-
The lens is clearly replaceable
-
No wiring issues exist
-
No broken mounting tabs
Call a professional if:
-
The unit is sealed and you’re unsure
-
You have LED-integrated assemblies
-
Wiring connectors are corroded or damaged
-
The housing is cracked or mounts are broken
Final Takeaway
Yes, you can often replace only the tail light cover (lens), and it’s one of the quickest exterior fixes for restoring safety and appearance. The key is confirming your vehicle uses a serviceable lens rather than a sealed assembly, installing it carefully, and making sure the seal is tight to keep moisture out.
Frequently Asked Questions (FAQ)
Can you replace just the tail light cover (lens) without replacing the whole light?
Yes, many cars allow lens-only replacement if the lens is sold separately and the housing/mounts are not damaged. Sealed designs usually require a full assembly.
How do I know if my tail light is sealed or serviceable?
If the lens is not sold separately and the unit appears glued/welded with no service fasteners, it is likely sealed. Many modern LED units are sealed.
Is it legal to drive with a cracked tail light lens?
Often no. A cracked lens can reduce visibility, allow white light to show, and may trigger a fix-it ticket depending on state rules and enforcement.
How much does it cost to replace only the tail light lens?
Lens-only parts often cost about $20–$120, while full assemblies commonly cost $80–$400+ depending on vehicle, OEM vs aftermarket, and lighting type.
Do I need sealant when installing a new tail light lens?
Some designs rely on a gasket and do not require extra sealant. If the original design uses sealant or the gasket is worn, use an automotive-grade sealant and ensure a complete, even seal.
Why is there condensation in my tail light after replacement?
Light fogging can happen briefly, but droplets or puddling usually mean a seal leak or missing gasket. Recheck alignment, gasket condition, and housing cracks.
How long does tail light lens replacement take?
Most DIY jobs take 20–60 minutes, depending on trunk trim access and fastener type. Allow extra time if sealant needs curing.
Should I buy OEM or aftermarket?
OEM typically fits best and seals reliably but costs more. Aftermarket can be affordable, but quality varies, so prioritize verified fitment and strong reviews.
Disclosure
Some links may be affiliate links. That means we may earn a small commission at no extra cost to you.